Feeds:
Posts
Comments

Archive for January, 2010

This is an incredibly versatile and delicious recipe that is simply good to have in your repertoire.  It’s one that most cooks have a variation of, and this is mine.  It really couldn’t be more straightforward, and is an excellent way of getting those dark leafies into your diet.

You can use any dark leafy that you like.  I used Dino Kale, which is one of my favourites. 

The best thing is that you can literally add whatever you like (or just have on hand) to the salad – beets, shredded carrots, seeds, nuts, peppers…the list goes on, obviously, limited only by your imagination and taste.  One of my faves to add is pumpkin seeds.

The salt and the citrus break down the fibres of the greens, making them more tender and easier to digest.  So don’t leave out the salt!!  But don’t worry about leaving the dressing on for too long.  While this salad is best enjoyed after the 30-minute marinade, the greens are strong enough to stand up to the acidity and salt for a few days.

And the recipe is….

1 bunch chopped/sliced dark leafy greens such as kale, dandelion greens, chard, or mustard greens, ribs removed

1/3 cup freshly squeezed lemon juice                     

1/4 cup olive oil

1/2 tsp salt

2 cloves crushed, smashed, or diced garlic      

Put the garlic, salt, olive oil, and lemon juice in a glass bowl large enough to accommodate the greens.  Whisk briefly with a fork.

Add your greens of choice.  It is best to use your fingers to coat the leaves with the dressing, but if you’re a bit squeamish about this kind of stuff, tongs will work too.

Massage the dressing into the leaves, to ensure that they are fully coated.  Let the salad marinate for approximately 1/2 hour.  Add your accompaniments of choice, and enjoy! 

Keep leftover salad in the refrigerator to enjoy another time.  This salad can last 2 to 3 days in the fridge covered.

Read Full Post »

This recipe is taken from The Whole Life Nutrition Cookbook, one of my new absolute favourite references for allergen-free cooking.  I was lucky enough to receive my copy of their cookbook in the mail a few weeks ago, and am just itching to work my way through it. 

I highly recommend purchasing their cookbook, as well as a visit to their website, as it has a lot of tips and recipes on it.  Their cookbook is available for purchase on their website.  A slightly modified version of this recipe can be found at their website, here – http://www.nourishingmeals.com/2009/02/gluten-free-vegan-sugar-free-chocolate.html

The genius part about this recipe is the use of beets.  While they use prunes in place of beets in the recipe on their website, I love using the beets.  Adding beets to the batter is a real old-fashioned way to make a cake, which makes me enjoy their recipe even more.  It’s a real throwback to the way people used to bake – so long ago that it’s virtually been forgotten. 

The beets add a tonne of moisture to the cake, not to mention a fair amount of nutrition, which gives you a great excuse to eat as much as you like!  I used golden beets, rather than red beets, simply because red beets are one of the few foods that I’m not that big a fan of.  That said, the taste of the beets is so subtle that I wouldn’t hesitate to use red beets if they were all I had access to. You wouldn’t even know they were in there unless someone told you that the cake was made with beets.

Be sure to cook the cake all the way through, otherwise the flavour of the beets does start to come through.  Also, make sure that the beets are very finely grated; give them a chop with a knife if necessary, or even use a food processor to grate them. 

The flavour of this cake is rich, moist, and chocolatey.  It tastes best when served with a berry sauce, coconut whipped cream, or both!!  This cake truly is succulent.  Mmmm…Enjoy!

Decadent Chocolate Bundt Cake from The Whole Life Nutrition Cookbook

2 cups brown rice flour

1/2 cup tapioca flour

3/4 cup unsweetened cocoa powder

1 1 /2 tsp baking soda

1 1/2 tsp xanthan gum

1/2 tsp sea salt

1 heaping cup grated cooked beets, about 1 large peeled beet

1/2 cup melted virgin coconut oil

1 cup maple syrup

1 cup water

2 tblsp apple cider vinegar

1 tblsp vanilla

Preheat oven to 375 °  Oil a bundt pan with coconut oil.

In a medium sized bowl, place the brown rice flour, tapioca flour, cocoa powder, baking soda, xanthan gum, and sea salt; mix together well with a fork (or a whisk).

For the 1 cup of grated cooked beets, first trim the ends off of the large beet then cut it into quarters.  Place the quartered beet into a steamer basket in a pot filled with about 2 cups of water.  Place a lid on the pot and steam for about 30 – 45 minutes or until beets are very tender.  Let cool then remove the peel and grate.  Measure out 1 heaping cup.

In a separate bowl, place the grated beets, melted coconut oil, maple syrup, water, apple cider vinegar, and vanilla.  Mix well with a wire whisk.  pour the wet ingredients into the dry and mix well, though be careful not to overmix.

Immediately pour the batter into the oiled bundt pan and place into the oven.  Bake for 25-30 minutes for a metal pan.  Remove from oven and let cool for about 10 minutes in the pan.  Then flip it over onto a cake platter or place.  I actually let it cool for 20 minutes – it will slice better if the cake is on the cooler side.

Read Full Post »

New Pages Update

Hi All!

FYI – there are two new pages here for your baking and reference pleasure: “The Well-Stocked Pantry” and “Favourite Cookbooks”.  The individual tabs can be found at the top of the page.

Recommendations for either page are always welcome!

Read Full Post »

Coconut flour, like all things that come from the coconut, is a wonderful addition to any pantry.  It shares two qualities with the other gluten-free flours: it  imparts a distinct flavour in anything you use it for, and is also absorbs a lot of liquid.  Coconut flour is made from dried, de-fatted coconut meat that has then been ground up.  It is slightly off-white or ivory in colour.

One of the great benefits of coconut flour is that it has high fibre and protein, contents.  It is particularly high in fibre, so it’s an extremely filling flour.  For those of you who are interested in these things, it is low-carb.  Like nut and bean flours, this will help to keep your baked good from being one big crumbly mess.  Use too much, however, and there is a definite coconut flavour to the final product.  Some people are okay with this; others…not so much.

Coconut flour produces a dense, moist crumb, and tends to work best in items like loaves or bars, or in any baked good where a dense final product is desireable.  It can absolutely be used in other items, such as cakes, however it should probably not be used as the primary flour, unless you have a real love for it, and cut it equally with a starch to improve the texture of the cake.

Read Full Post »

So I have to confess that I am getting pretty sick of eating the cookies I still have leftover from Christmas.  Yes, I realize that I am complaining about having too many cookies.  No, I never thought this day would come either.  But here it is.

These bars are a great alternative to cookies or cakes.  They’re sweet, but also have a lot of protein in them.  There’s the added bonus of the olive oil, which contributes those coveted Omega oils to your diet.  Plus, they’re extremely portable so they’re great for taking to work or school or hell even a walk with the dog – why not?

The bars are moist and rise a lot when baking, thanks to the eggs.  I am really finding that eggs are essential to obtaining the desired moisture and lift in cakes and bars like these.  Obviously, if you cannot tolerate eggs, you can easily replace them with some additional xanthan gum, flax gel, applesauce, or whatever your favourite egg replacer is.  The batter will still rise, but not as much as it will with the eggs.

The batter is almost shockingly dense, and will barely cover the bottom of a 9 x 9 pan.  However, it will most definitely rise to the top of the pan, so don’t be alarmed at how thin the batter looks at first in the pan.

Also, you can always add more or less pecans and chocolate chips to the mix; it all just depends on your preferences.

Quinoa Chocolate Chip Bars

1 cup quinoa flour

½ cup sorghum flour

1/3 cup tapioca starch

1 tsp baking powder

¾ tsp baking soda

1 tsp xanthan gum

1 tsp cinnamon

Pinch of Sea Salt 

½ cup olive oil

2 eggs

½ cup agave

½ cup honey

1 tsp vanilla

2/3 cup chopped pecans

2/3 cup chocolate chips


Preheat oven to 375°.

Whisk all of the dry ingredients except for the chocolate chips and pecans together in a large bowl.  Then add in the chocolate chips and pecans, stirring with a spatula to combine.

In a separate bowl, whisk the eggs, then add the remainder of the wet ingredients to the eggs and thoroughly combine.

Add the wet ingredients to the dry, and combine thoroughly.  The batter will be very wet.

Empty the batter into a lightly greased 9 x 9 pan (or the closest approximate size that you have).  Cover with aluminum foil.  Bake squares in the oven for 20 – 25 minutes, or until a toothpick comes out clean when inserted.  Remove the aluminum foil for the last 5 or 10 minutes of baking time to ensure a golden top.

Read Full Post »

A Brief Update

Hi Everyone!

This is a brief post to let you all know that, yes, I am still alive, even though there hasn’t been a post in a while.  The thing is, I have so much left over from my Christmas baking that I haven’t had any reason to do any baking.  So while I am missing the kitchen a bit, I definitely have to clean out my freezer a bit before I start any new projects.  I’ve even run out of Tupperware.  I may have overestimated how much food we needed for the holidays…

Thanks to you all for reading my blog, and posts will begin again soon.  And don’t forget you can subscribe to my blog so you don’t need to keep coming back to check to see if there are any new posts.

Read Full Post »

This post is is going to be fairly short and sweet.  I think this was my final great pizza experiment – it was a bit of a disaster.

After reading somewhere that doughs such as pizza and pie crusts needed to be flexible, I decided to conduct an experiment.  To make a gluten-free dough flexible, there needs to be high percentage of protein in the flour mixture.  Since I was simply satisfying a craving, I made my recipe up on the fly.  It was –

1/3 cup quinoa flour

1/3 cup millet flour

1/3 cup chick pea flour

2 tblsp. tapioca starch

1 tsp xanthan gum

2 tsp. baking powder

1/3 cup milk of choice (I used rice milk)

1/3 cup olive oil

Pinch of salt

Thanks to Harold McGee (see my book review at https://masteringtheartofwholesomecooking.wordpress.com/2010/01/06/book-review-on-food-and-cooking/), I now know about the importance of salt in cooking and baking, and know that it does more than add just flavour to dishes.  So don’t forget to add that salt!!

The dough was nice and moist.  However, it didn’t hold together very well.  Now, this could of course be corrected with more xanthan gum.  But I must confess that I really could taste the flour in the dough.  The proportion of highly flavoured flour to bland was simply too high.  In the end, I had to eat the pizza with a fork – no knife necessary.

To sum up, this is not a recipe I would try.  But I did want to share the news about needing a high-protein flour blend with those of you who are still trying to make that perfect gluten-free pizza.  But as this experiment shows, there can be too much of a good thing.

A few months ago, someone suggested using potato flour in the dough.  I still think this is a great idea, only I never ever have potato flour just lying around.  It just doesn’t have the versatility in it that I need to keep a flour in stock.  I would think about 1/4 of a cup would be enough to add elasticity to the dough without adding a lot of gumminess to the crust. 

Additionally, I cannot stress enough that you need to use lots of tomato sauce when making a gluten-free pizza.  Gluten-free flours will suck the moisture right out of anything, so you have to compensate for this tendency.

I have come to the rather sad conclusion that I will never be able to replicate the pizza crust that I miss so much.  I guess it’s just something that I have to accept, like the fact that I will never be able to replicate a croissant successfully.  I suppose that one day I might take up the challenge again, but I think it would take a month of concerted, non-stop effort to come up with the results that I desire.  But for now I must lay the gauntlet down.

Read Full Post »

I was lucky enough to be given a copy of this book for Christmas.  Well, actually I was given a gift certificate for amazon and purchased this book with it.  But, same difference.  The end result is what matters.

Harold McGee is a former professor and current New York Times columnist (“The Curious Cook” – for more about Harold McGee visit curiouscook.com).  In On Food and Cooking, he has written an 800+ page reference book on the science of cooking.  For those of you who have always wondered why eggs make things rise, or what happens at the molecular level when you turn a nut into a nut butter, this is the book for you.

McGee skillfully describes all aspects of food production, nutritional value, molecular structure, and how it interacts chemically with other substances.  He does an excellent job of covering all of the major food items, from dairy to grains to sugar.  There is even a chapter on alcohol – an important addition for those who use it in cooking!

McGee writes lovingly about his subject.  He clearly adores his subject, so much so that it is hard not to experience intense cravings while reading!  Each chapter includes interesting quotes about food, word origins, and even old recipes for familiar classics.  In many ways, there is little that has changed about the way we enjoy food since then.  The book is a bit of slow read because everything in it is fascinating.

The only drawback of the book is that it is clearly not intended for people with food allergies.  The information on alternative flours and grains is fairly basic; he does not go into great detail about how to bake or cook with them, or how to substitute gluten-flour with gluten-free flour.  There are a few juicy tidbits in here about allergen-free cooking, but they are few and far between.  Moreover, they are difficult to find, as the index is not geared towards this style of cooking.

Nevertheless, this book is a welcome addition for anyone who has ever been interested in the chemical actions of food.  It provides a greater understanding of what happens in the kitchen when you mix two ingredients together and apply heat.  The research that McGee has conducted on his subject is immense and even awe-inspiring; it is difficult to even imagine how many hours were spent investigating the various foods that he writes about.  For that reason alone, this book is worth reading, and perhaps even adding to your collection.

Read Full Post »

Pumpkin is delicious.  It’s a fact.  I just can’t help but to continue to experiment with it.  It adds so much flavour and moisture to baked goods.

It’s the holidays, so my diet has been, well, not so good.  This recipe uses 2 eggs, and the glaze does use icing sugar, so it’s a bit of a cheat, but it is so worth it!  The cake is nice and light (thank you, eggs), and the glaze is truly the perfect accompaniment to the flavours of the cake.

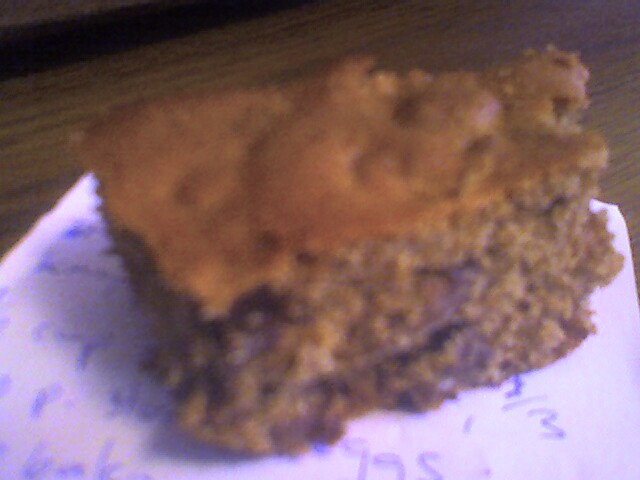
I had my final test run with this cake today, and realized why I like it so much: it’s like a giant pumpkin pancake with gooey maple syrup.  If that sounds good to you, than this is the cake for you.

It is important to use only either soy, a nut milk that is high in protein (5 g of protein/cup), or hemp milk to make the “buttermilk”.  The acid reacts with the protein in the milk, so something like rice milk will not produce the desired effect.  Soy milk works the best, as it is the highest in protein. 

I have been trying to determine how much protein homemade almond milk has in it, but have not been able to find an accurate number.  However, I have discovered that some almond milk producers don’t use actual almonds to produce their milk.  They use some kind of almond paste instead because it’s cheaper.  With this is mind, making your own nut milks at home is probably the best idea.  This way, you can get the most nutritional value out of the nut, as well as control the consistency and sweetness of the milk.

It is a real crowd pleaser; it has been tested on people with “normal” diets, and passed with flying colours.  Enjoy!

Pumpkin Cake

1 cup brown rice flour

1/3 cup coconut flour

1/3 cup millet flour

1/3 cup arrowroot starch

1/2 tsp xanthan gum

2 tsp baking powder

1/2 tsp baking soda

3/4 tsp ground ginger

3/4 tsp cinnamon

1/4 tsp ground cloves

1/4 tsp nutmeg

6 tblsp coconut oil, not melted

1/4 cup agave

2/3 cup pumpkin purée

2 eggs *if you must replace the eggs, use 1/2 cup unsweetened apple sauce

1/3 cup soy, nut, or hemp milk

1 tblsp apple cider vinegar (or lemon juice, in a pinch)

1 tblsp vanilla extract

First make the “buttermilk”.   In a small bowl, combine your milk of choice and the apple cider vinegar.  Set aside for 15 minutes.

Preheat oven to 400°F.  Lightly grease a cake pan.

Whisk all of the dry ingredients together in a bowl.  Add in the coconut oil, and mix it in with your fingers (you can cut it in, if you, unlike me, have the patience for this).  The dough will be slightly crumbly and resemble coarse sand.

In a separate, smaller bowl, mix together the pumpkin purée, eggs, agave, vanilla extract, and “buttermilk”.

Add the wet ingredients to the dry ingredients, and stir to combine.  The dough will be slightly wet, but will hold its form fairly well.

Scoop dough into cake pan.  Pat down with wet fingers to ensure smooth surface on top, if necessary.  Brush the top of the cake liberally with your milk of choice, to ensure that it doesn not burn.

Bake for 20 minutes at 400°F.  Reduce heat to 350°, and cook for an additional 10 minutes.  The cake will be golden brown on top and your kitchen will be very aromatic!  The cake is finished when a toothpick comes out without any crumbs stuck to it.

Let cake cool for ten minutes in its pan on a rack.  After ten minutes, turn the cake out and let it cool completely.

Maple glaze

1/2 cup pure maple syrup

1/2 cup icing sugar (or your solid sugar of choice – I used jaggery)

Combine the two sugars in a small pan and heat on the stove until combined.  Let the syrup cool for about 10 minutes before working with it.

I highly recommend piercing the cake with a knife or a toothpick all over, allowing the glaze to be fully absorbed into the cake.

Use a pastry brush to ice the cake.  Or, if you’re feeling slightly more daring, simply pour it over the cake.  Delicious!

Read Full Post »